Arcade Cabinet
From Mike Beane's Blog
The Find
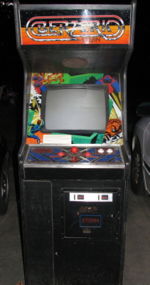
So I took a different road home from work the other night and along the side of the road was a "Berzerk" arcade cabinet sitting amongst a stack of things that looked to be destined for the dump. Overall the cabinet looked in fair condition. I made a note of a sign that said 'Tent Sale Fri-Sat' and I stopped by this morning before going to a family gathering. I asked how much and the guy said "You can take it. It boots to a test screen, but that's as far as it gets. The manual is in it, but I can't do anything with it and I can't sell it as working."
Free.
I went back tonight with my nephew and a truck.
It is mine!
It doesn't look pretty on the inside and I think something lived in there. The PCB boards and wiring look like some animal had a good time with them. Tomorrow I'm going to fire it up and check it out. If that doesn't yield a good outcome, I'll do some measurements and then start gutting the internals. Hopefully I'll have some slow progress over the next few months on this, but for now I'm happy that I have an arcade cabinet and I'm probably going to start working on getting a MAME machine running within it..
CRT swap out might be a bugger....so much to think about it.
The Gutting
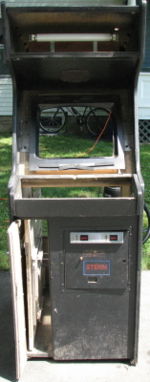
Spent the better half of the morning gutting the machine. Turned it on and the CRT tube powered up, but nothing else. Reset the cables and checked the fuses - no reaction. Unfortunately this thing has been sitting outside for a bit and I'm not sure it really could have been salvaged.
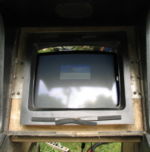
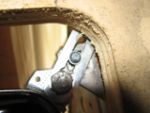
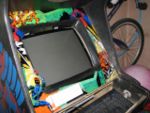
Pulled the guts out, including the wiring harness and CRT. Kept the CRT bracket and re-used that with a 19" CRT monitor that I had in the attic. Unfortunately the bracket connectors on the monitor are slightly smaller than the CRT's, so there are some gaps. Hopefully I can work on this.
Hauled it into the back room tonight and I need to start loading the PC OS. I'm researching (part of the measurements reason) controllers. I'm not sure that the X Gaming controller set (which IMHO looks to be the slickest out there) will fit in the width of the current controller. I don't have any sort of real work area for woodworking so I'm not seeing myself go down the build your own controller deck path.
Updates
August 23
- Loaded the PC OS
- Mounted the motherboard, hard drive and power button assembly
- Placed temporary speakers in the box
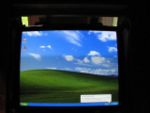
- Booted successfully and tinkered with MAME using a keyboard as the controller deck
- Picked up some bolts and brackets
- Created one corner connector for the monitor - mounted good
- 1/3 of the way to purchasing the controller deck
August 25
- Finished the corner connectors for the monitor and mounted the entire unit
- Re-used the base monitor rails and added hold points to the housing for the monitor base
- Fired it up and all was good
Debating on putting the ATI 9800 AGP card in the box once the X800 arrives next week (Thanks Slug) as a couple of games appear to bash the Intel onboard video fairly hard. I need to find the 2nd set of speakers in the attic and get those in the box, then decide final placement and mounting. The paint on the glass continues to fleck off and is slightly distressing. Considering taping the center and either spray painting the edges to keep the existing paint or spray adhesive. Overall the main system is running pretty well.
Craving that controller deck ever more now.
August 30
- Installed a wireless nic, mostly temporary as there is no CAT5 in that area of the house yet.
- USB game controllers for emulators aren't working 100%, little flaky
September 15
- Moved the ATI 9800 Pro to the cabinet - XP wants to re-authenticate. Haven't powered it on since that came up.
- Video card is too tall, can't slide the maintenance board out anymore.
- Pulled off the motherboard and power supply.
- Cleaned out the area behind the coin slot and started looking at mounting everything within reach of the right side interior wall.
- This would make 8 USB connections readily available (6 on the mobo, 2 on the remote block).
- Kept the L brackets from the transformer, might be useful for mounting the power supply to the same wall.
- Opens up the option for putting in 3 IDE hard drives, an optical drive and a SATA drive in the cabinet (there was no room on the maintenance board).
- Found a couple of people out there with Berzerk converted cabinets:
- Black 'n Blue
- EV
- IM Berzerk - emailed this guy - no return
- Started reading the forums at ArcadeControls.com
September 22
- Mounted the motherboard on the right interior wall.
- Introduces stability issue with the AGP & PCI cards as they aren't held into the slots by anything.
- Authenticated XP via the phone - no issues
September 25
- Mounted 3 IDE drives and an optical drive (SATA is being a PITA at boot time)
- XP now has issues when booting
- Makes it to the black desktop with mouse arrow, then appears to hang. USB ports are still operating
- Need to test the IDE cable, check jumpers and try different booting configurations
- 1/2 of the way to the controller deck purchase
October 23
- The current PC is crap. Reloaded XP and the issue persists. I have a fall-back PC that will still support the 9800, so I need to load that out with Win2K as soon as I can. When I build a new 'main' PC in February, I'll consider moving my XP2800+ into the cabinet at that time
- I may pull the guts out and try to troubleshoot the existing PC one more time
- Ordering the controller deck next week
October 27
I found 'The Berzerk Project' page below and I really got thinking about this more. I'm going to stop at this point and wait until spring next year ('08) to resume working on this. In February I'll be building a new PC and this PC will become the guts of the new one. It has enough horsepower to run MAME and some other emulators so it should make the task easier.
What I got out of the mentioned webpage was how well the guy did on restoring the actual cabinet itself. I'm not sure I can get that detail, but it kind of set the bar for what I should be concentrating on: a nice looking cabinet. I'm still thinking about the side art (in fact I need to get in touch with Book to see if he might be up for some custom stencil work) and what to do. If I do go with something custom, I may need to consider a new marquee and front glass, though the glass is classic no matter what.
In a Fatherly Moment, I also decided to take the current controller fund and get Callum a train city for his second birthday next month, so the counter has been reset. Not to worry, even though I've done that, I'm already back at the 1/2 way point for savings.
July 16th
After many months and other things I spent the money on or donated to, I've finally ordered the controller.
August 3rd
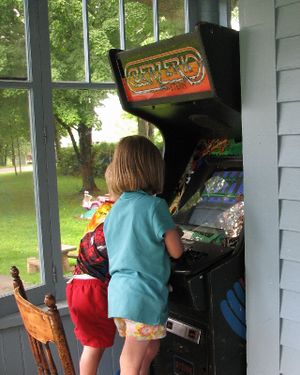
The kids give the cabinet a test. I've added the coin buttons to the front panel. Still needs cosmetic touches and tweaking, however it is operational.
Feb 2009 Update
- Moved 'coin' buttons to the cabinet housing.
- Finished anchoring the control deck. No modifications were made to the deck. Used metal expanding drywall anchor screws. Used vacant coin holes as the anchor pass through.
- Used clear adhesive to stop the erosion of the glass paint (flecking)
- Configured way to exit game and get back to front-end (Game-Ex) w/o keyboard access
- Painted all external metal
- Cleaned metal (shiny!)
- Returned email to Shawn Walters @ X-Arcade: controller works great
Things To Do
- Remount the monitor up 2 inches
- Determine common point for all 120v electrical connections
- Install fluorescent light behind bezel
- Finish mounting the speakers (with volume control)
- Determine final paint of the wood (or leave alone?)
- Determine if serial port LCD display is useful
- Determine on final PC components and what additional features will be added (jukebox?)
- Recently upgraded my main PC. Looking like my AMD2800+, 1.5GB RAM, ATI x800 and assorted gear will become the final guts for the machine. It should rock out pretty well.
References
- The Berzerk Project
- Black 'n Blue
- EV
- IM Berzerk - emailed this guy - no return
- McMean's Cabinet - a Berzerk cabinet restoration
